In Cadasio, you can control the animation of 3D and 2D objects, as well as being able to control animation transitions between steps, and even the camera.
Types of Animation
On 2D and 3D objects there are four types of animation.
On Show - controls how an object is animated when it becomes visible in the current step.
On Hide - controls how an object is animated if it becomes hidden within the current step.
On Move - determines how an object transitions from point A to point B between any two steps.
Attention - helps to highlight an object, and are useful to indication interaction.

How to add an Animation
The most commonly animated properties are visibility and position.
When animating position, the default behaviour is called tween. This means that as the position of an object changes across a step, the object moves from point A to point B through the quickest route. To edit an object’s animation, click on the object, and select animations from the general tab.

Under the On Move dropdown there are several options for how an object animates when being moved. Initially this is set to default which means it will use the animation settings defined in the step.
To apply a different On Move animation, choose from the drop-down list and click confirm and then update the step.

As well as being able to control the on move animation of an object, visibility can also be animated. By default, Cadasio will automatically fade items when hiding or showing them. Again, this is defined by the animation setting for the step.
To edit this animation behaviour, select an object, and click animations from the general tab. On Show and On Hide are what controls the visibility animation. To apply a different On Show and or On Hide animation, choose from the drop-down list and click confirm and then update the step.

It’s important to understand exactly how Cadasio sets its properties, so let me explain that.
Any animation option that is set is for the current step. So for example, if an object is visible in Step 1 and then hidden in Step 2, any changes to how that object is hidden is set using the on hide options within Step 2.
If the same object then needs to be visible again in Step 3, it’s the on show options withinStep 3 that control how the object is shown.
Take a look at the graphic explainer below.

All animation types within Cadasio work this way.
Everything you can set on a 3D object can also be set on a 2D object, in fact you have more animation types available for 2D items, such as swing, drop, swirl, grow and flip, as well as a few others too.
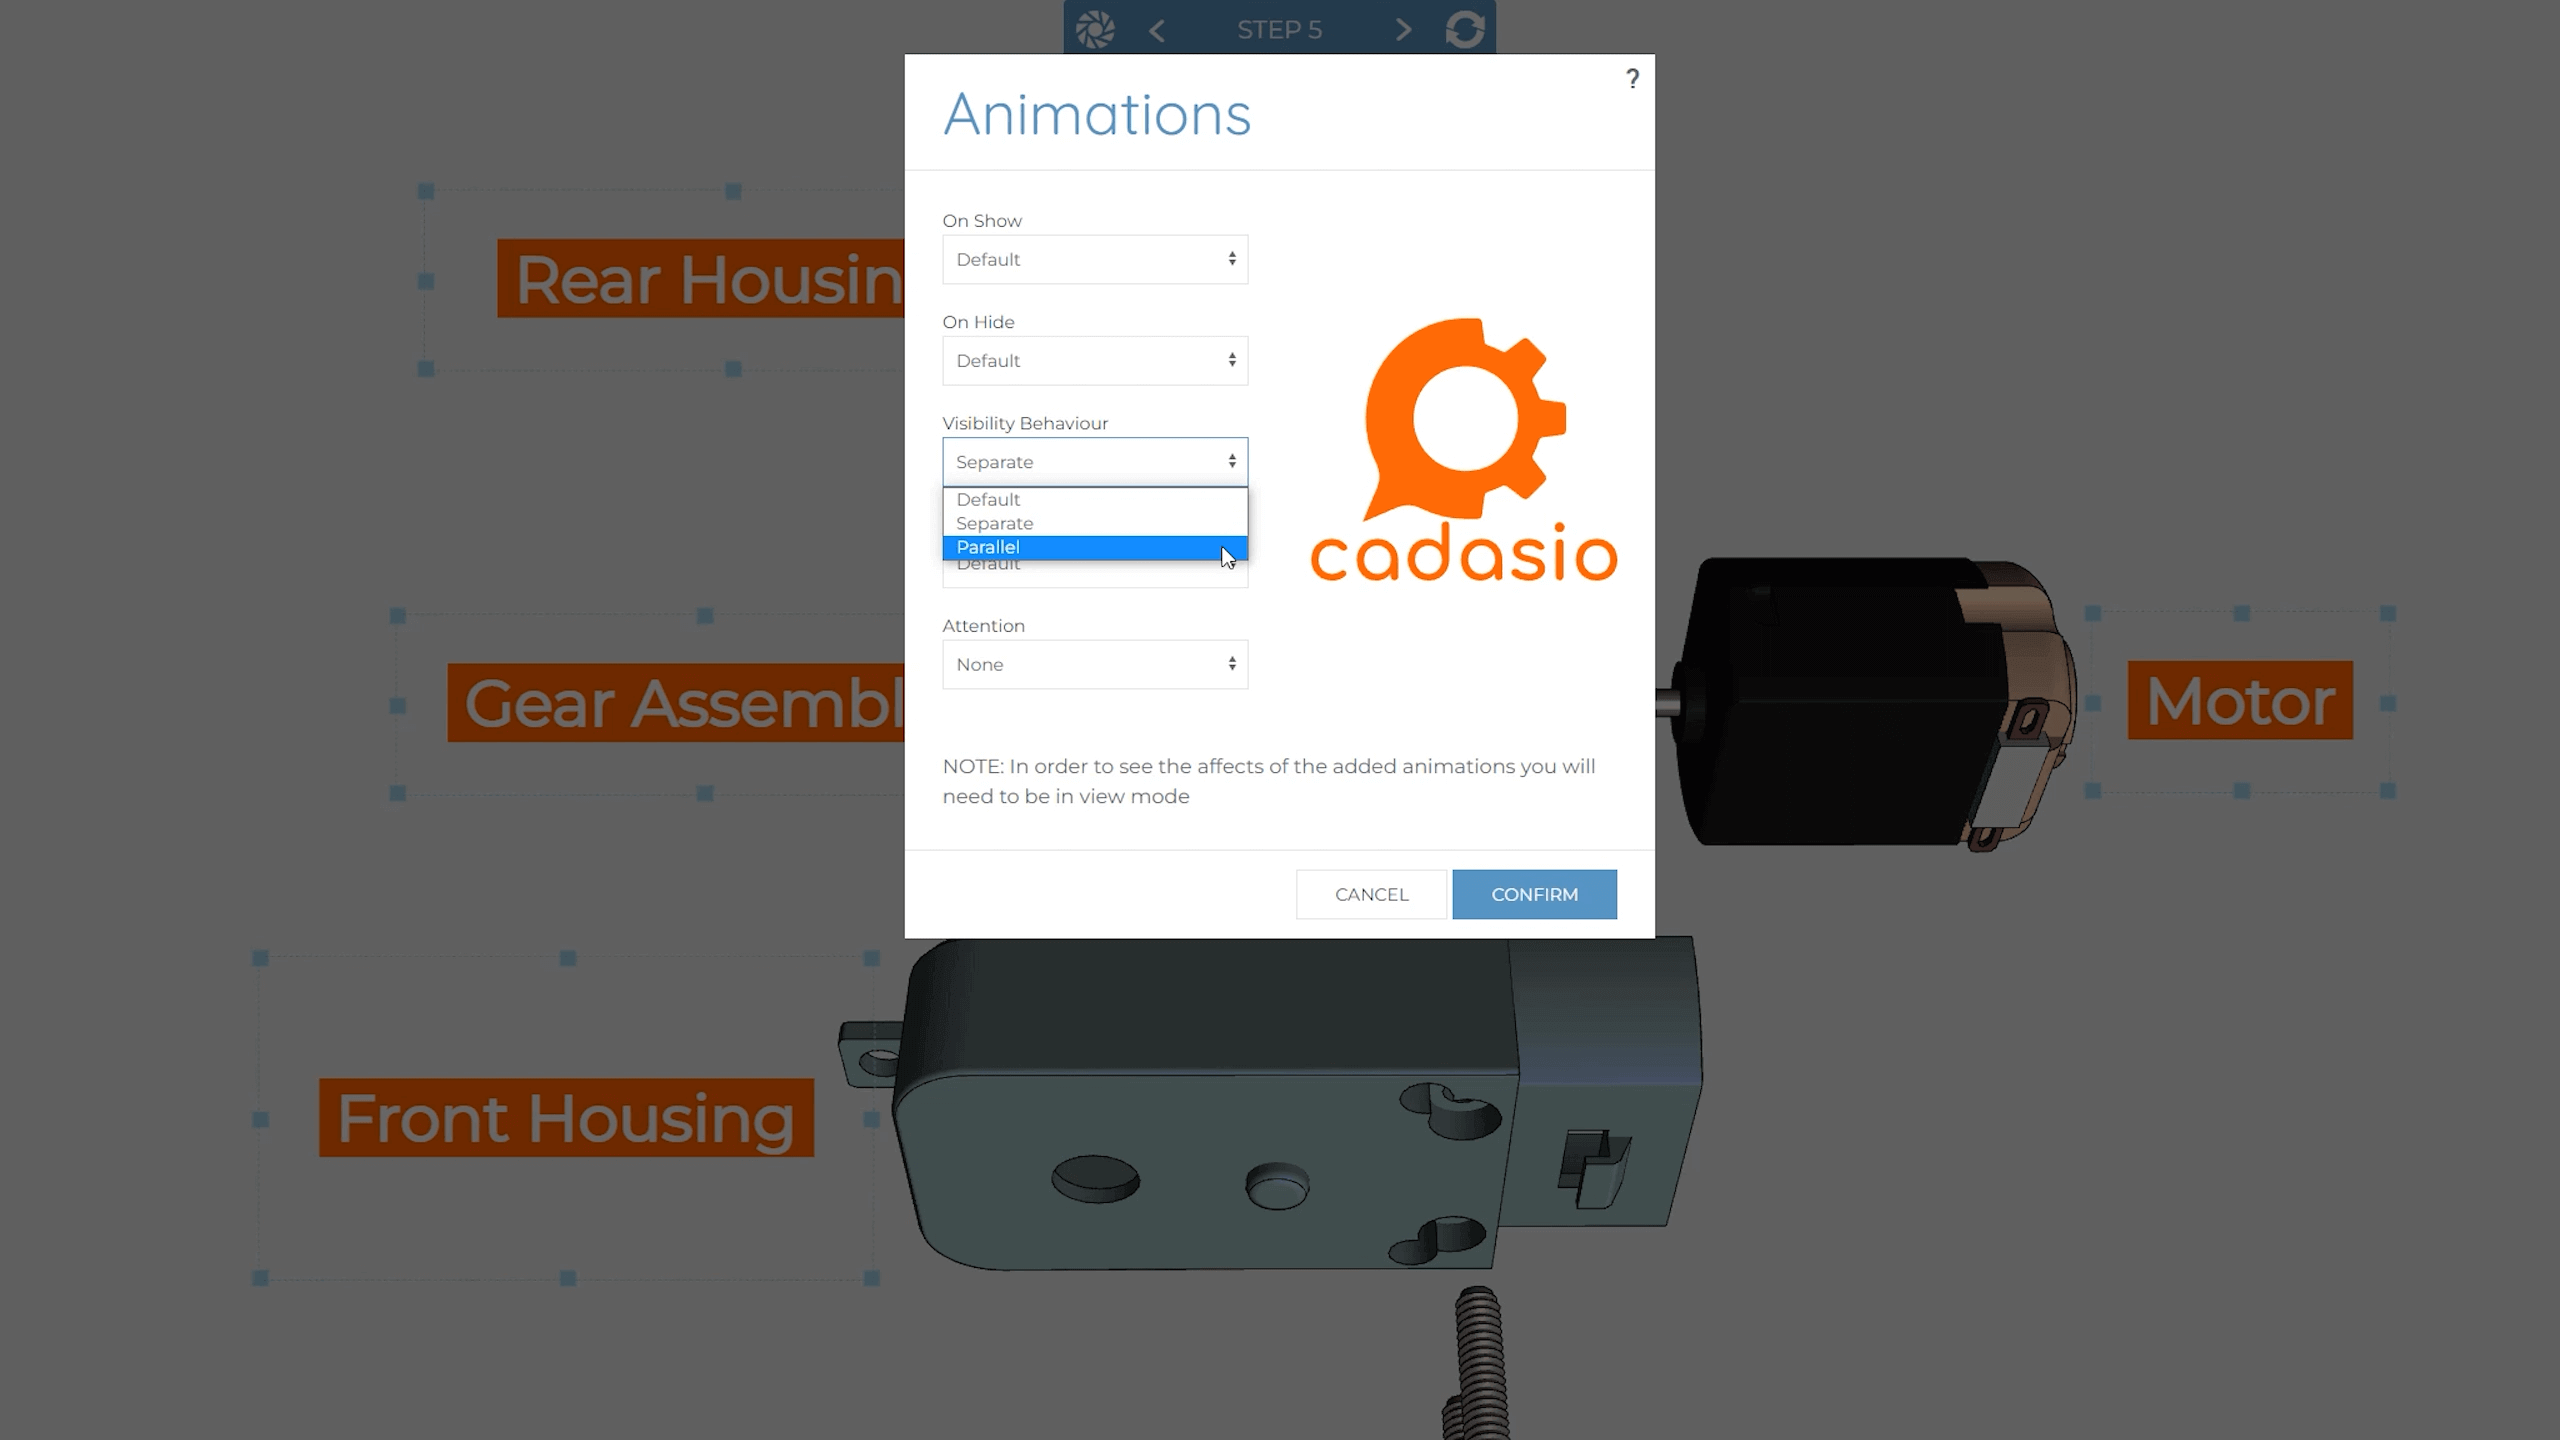
In addition to these animation types, there is a secondary animation option for 2D items called visibility behaviour.
Visibility Behaviour
When navigating between steps, you may have noticed that the visibility of 2D items animate at a different time to other animations in your scene, this is set by default so that the camera and 3D objects are positioned first, allowing the 2D items to appear more cleanly. This default behaviour is referred to as separate. You can modify this so that all animations take place at the same time, and this is done by selecting a 2D item and setting it’s visibility behaviour to parallel.
Every animation option so far has been object specific. However, each step has a default animation type that gets inherited if no object specific animations are set. Changing an individual objects animation behaviour overrides what is set in the step.
Because step settings control all objects within a step, it can be more convenient to change the step settings so that all objects are affected.
To change a steps settings, in the steps manager, click settings on a step and go to the animations tab. You will see tabs for different types of objects, including 2D, 3D and the camera.

The options tab, has options to control the speed at which the step is animated, and allows the bypass of all animations. When all animations are bypassed, animation transitions can instead be used.
An animation transition overrides any animations that have been set and instead presents each step based on options such as fade, push, scale and spin.

Think of transitions like the transitions between slides in PowerPoint. This is a really quick way to move from one step to another without having to specify exactly how each object should be hidden, shown or moved and is a great solution to not only make a fantastic looking presentation but also speed up project creation, especially when you have a large amount of objects changing position or visibility.
Check out our Step Transitions video for information on how they work.